You've decided this conversation needs a ticket. Now you turn it into one. Here's what the buttons do.
Where the button lives
Open the chat in the Inbox. In the top-right of the chat header, there's a Convert to ticket action. Click it. A dialog opens.
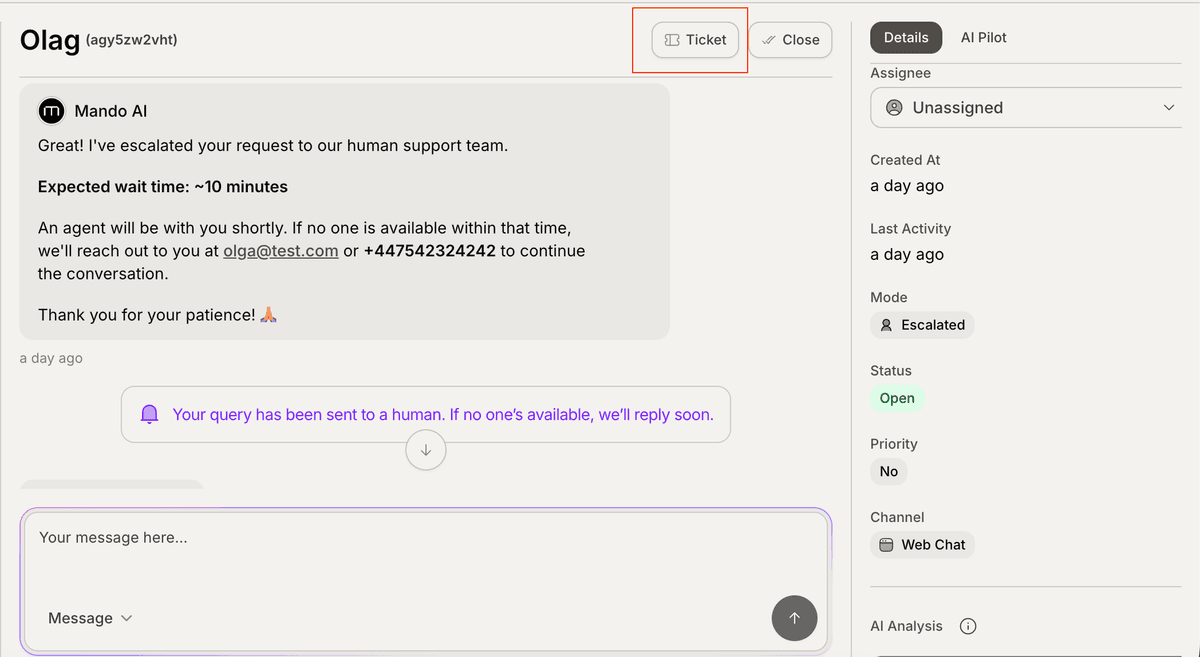
That's the whole entry point. There's no second secret way. If you don't see the button, the chat is probably already a ticket — check the Tickets tab.
What's in the dialog
The dialog has fields. Most of them have defaults. Most of the defaults are fine. Here's the short version of what each one does:
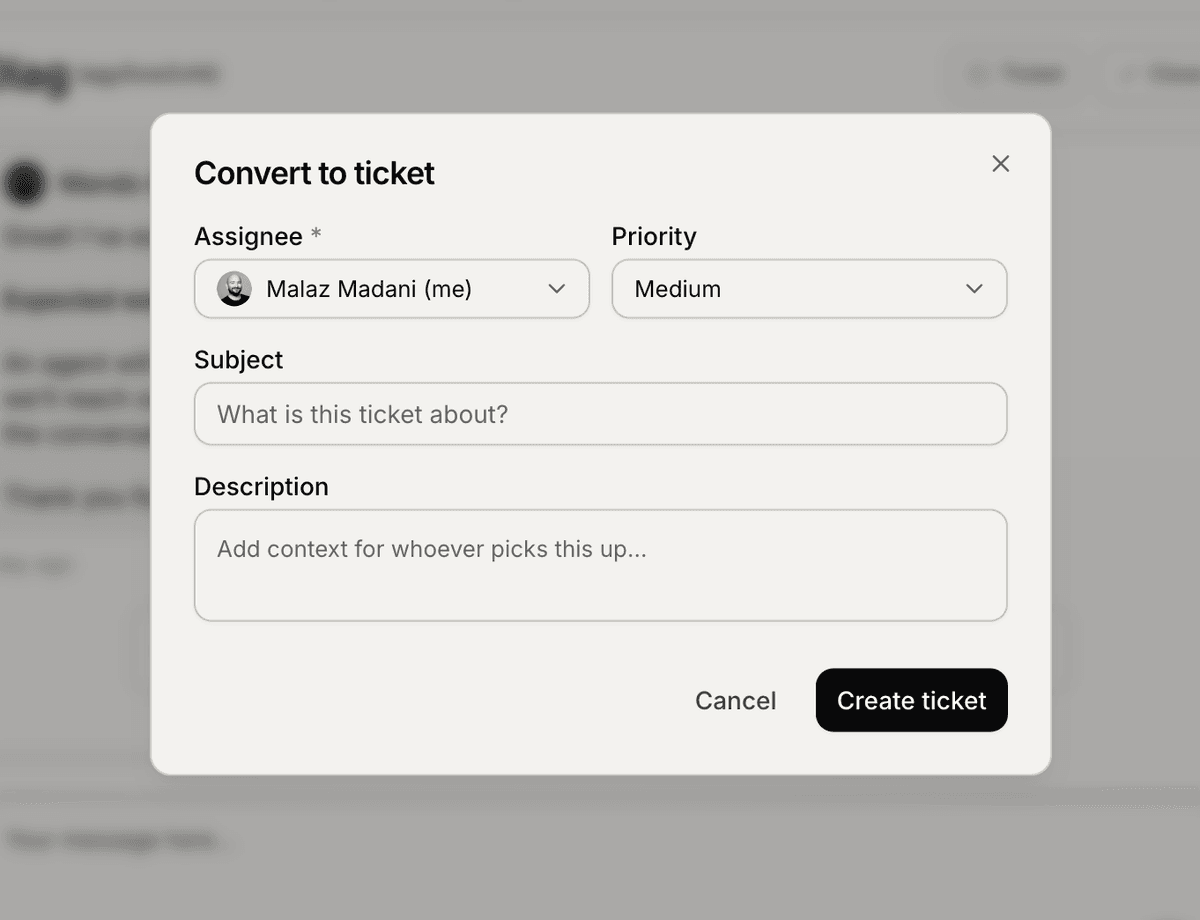
Title — auto-generated from the conversation by AI. You can edit it. The title is what you'll see on the Kanban card and in search. Don't make it longer than a tweet.
Summary — also auto-generated. Useful for the next agent to read in five seconds. Edit if the AI missed the point.
Status — defaults to Open. Leave it unless you have a reason.
Priority — defaults to Medium. Bump to High or Urgent only when it actually is. If everything is High, nothing is.
Category — defaults to Support request. Pick "Bug report" if it's a bug, "Feature request" if it's a feature ask. Category is what powers your analytics breakdowns.
Assignee — required. Pick the person who's actually going to do the work. "Whoever's around" is a polite way of saying "no one."
Type — defaults to Customer. Leave it. (Other types exist but are hidden in V1.)
The minimum useful version
If you're in a rush, this is the smallest set of decisions that matters:
Assignee — set this. Always.
Priority — bump if it isn't Medium.
Category — change it if "Support request" isn't the truth.
You can skip the rest. Hit Convert.
What happens after you click Convert
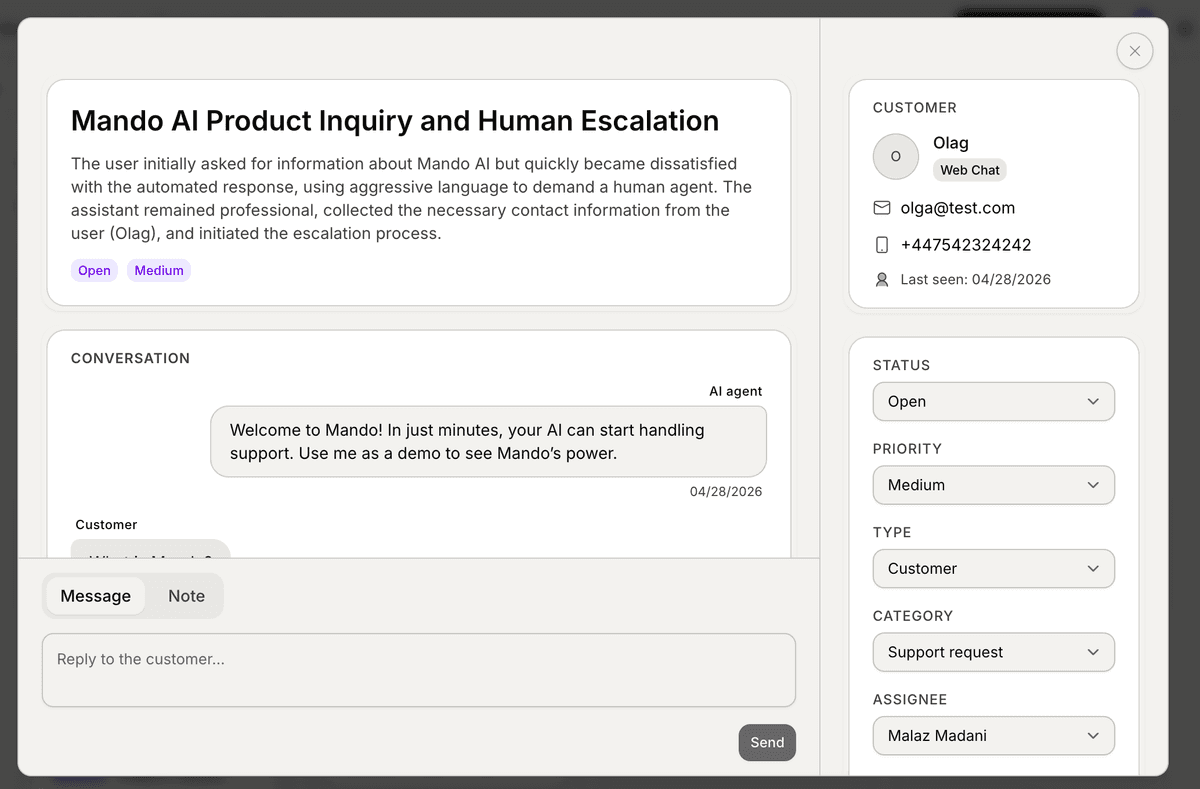
Three things, all at once:
The ticket appears on the Kanban under the Status column you picked (Open by default).
The chat keeps going in the Inbox. Same window, same history. The customer sees nothing change.
The "Convert to ticket" button in the chat header swaps for a View ticket button. One click takes you to the ticket detail page. From there, the Linked chat link in the sidebar brings you back. Round-trip is one click in either direction.
The activity log records who converted and when. Internal notes (yellow background, team-only) are now available. Snooze, SLA timers, and bulk actions all light up.
If you don't have an email channel set up
You'll see an orange warning banner in the convert dialog. The dialog still works — you can still create the ticket. But until the customer comes back to your chat widget on their own, your replies won't actually reach them.
Tickets are built for cases that span days. The chat widget is built for cases that span minutes. Without email, the bridge between those two is missing.
If you only ever do one ticket-related setup task, set up the email channel. It's a one-time job. There's a separate article on it.
Common mistakes
Setting Priority Urgent because the customer wrote "urgent." Customer urgency and operational urgency aren't the same thing. Read the issue first, then set the priority.
Leaving Assignee blank. A ticket nobody owns is worse than no ticket. (V1 won't let you actually leave it blank — but agents have been known to assign themselves and forget. Don't.)
Converting and then immediately resolving. If you can resolve it right now, just resolve the chat in the Inbox. Skip the ticket layer entirely.
Editing the AI title into something cryptic only you understand. Future-you needs to read this on the Kanban next Tuesday. Be kind to future-you.
What's next
The ticket is on the board. Now you have to actually work it. Next article walks through the Kanban — moving cards, filters, finding things, the daily loop.
→ Next: Manage tickets on the Kanban board